Sunday, December 30, 2018

Day 12, Melancholy and Frustration

Despite multiple stern looks, my old calcium reactor has yet to clean itself.  I decided to finally lift it off the garage floor and bring it to the sink.  The reactor in question is a 2-stage Reef Octopus CR140D.  I feel like it will be a good reactor, even if it's maybe a bit small.  Time will tell.  I've never actually run it as a calcium rector.  Way back whenever, I purchased it to use as a sulfur denitrator.  Which it did quite well at honestly, aside from the various horrible problems that sulfur denitrators have.  (like trying to kill my fish)

Of course, problems arose.  First, I couldn't find the O-rings that seal the top shut.  Well.. that's a problem.  Luckily, we have the power of the internet.  Turns out there is an amazing website called "The O-Ring Store".  And yes, they have O-Rings.  What kinds you ask? What sizes? Well, all of them.  *ALL* of them.  So O-rings are measured by the inside diameter of the ring, and then the diameter of the rubber part of the ring.  So I took a pair of calipers to my reactor, measured the inside of the groove and the width of the groove, and found it was about 103mm x 3.5mm.  Turns out they have that.  They also had a few other sizes right around the same dimensions, so I got 3 sets, just in case I measured wrong.  6 O-rings, $9 with shipping.  Ok, that's a win.

Back to the cleaning.  So now I'm working on the pump, and it looks like the impeller is siezed up inside the shaft.  Sigh.  A few hours with vinegar isn't helping here, and when I plug it in, I don't even get a baneful hum, so this pump has had it.  Well, no big deal, people sell pumps, right?

Kinda.  Turns out Reef Octopus stuff is all crazy metric fittings.  So now I'm trying to figure out if I have to scrap all the external plumbing, and buy a bunch of crazy adapters, or if there is some other way.  Luckily, Coralvue sells a pump called the Aquatrance 2000, which is a replacement for the OTP-2000 in the reactor.  They also luckily sell a conversion kit that makes it all fit together.  Apparently there are two versions of the OTP-2000, and I have the one that is replaceable.  There is another one, with a smaller diameter output, which if I had, I would be SOL.  I place the order, and a little message comes up telling me if I place my order between Dec 29th and 31st, it won't ship until Wed the 26th of Jan.  I find this odd, because that is a Sunday, so, I wonder what year that message is from?  I hope it's not actually true..  sigh..

Quick check on calendar says 2011.  So.. Hrmm.

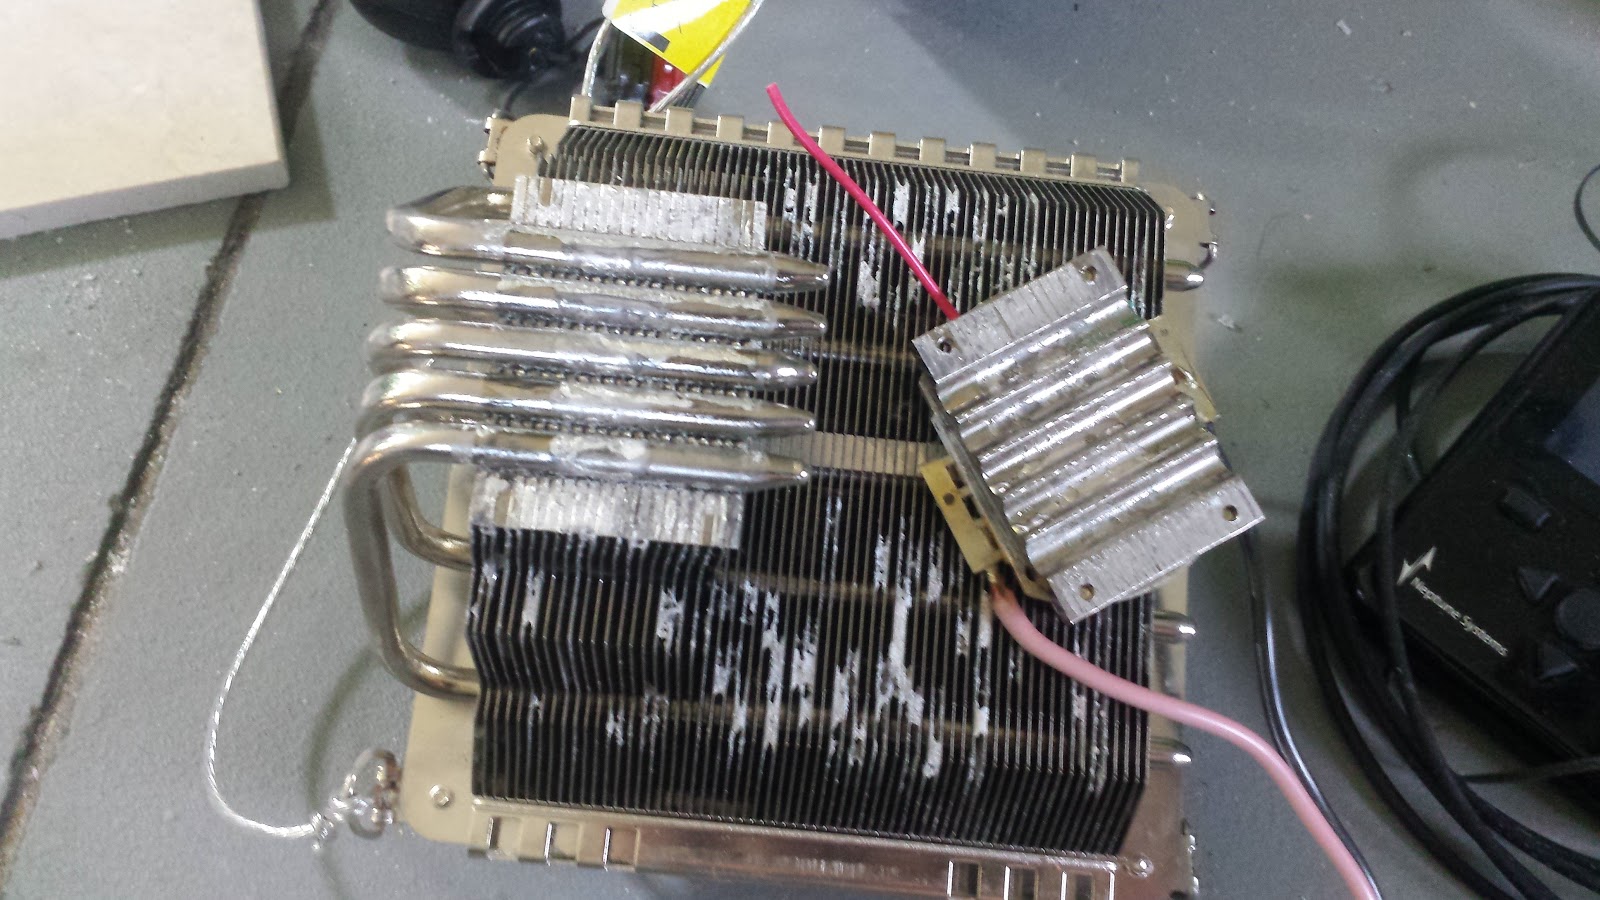
Well, the calcium reactor is clean now, and it has returned my stern looks with a variety of frustrations.  I don't need it right away, but this is still annoying.  Hopefully it all works out and I don't have to buy another one.

So let's move on to sump #3, the algae fuge.  I have an old 25 Gallon tall, from a failed aquarium many many years ago.  That particular loss makes me a little sad, as the topoff fitting came loose, sprayed the autofeeder, which went nuts and dumped it's entire contents into the tank, killing everything.  It has sat in the corner ever since.  I wanted both the rocks, and the tank from this, so, I got to work pulling the rocks out, throwing them in buckets, and then disassembling the rest of the tank.  4 buckets of rocks in total.

This is the part that got to me a bit, as the rocks I pulled from this tank, were also rocks from my original reef tank nearly 20 years ago.  Some of them were dead corals from the crash of that tank (AC failure in Arizona, July), and some of them still had epoxied frag plugs on them.  Each little skeleton brought back a memory of that specific coral, and I could remember them like it was yesterday.  It was a little bittersweet to be outside blasting them with a hose, remembering them.


I miss those brown sticks from back in 2001.  :)

Moving along, I blasted all the rocks clean, and then went ahead and blasted out the tank.  It will actually be perfect for the extra sump.  I went ahead and ordered a retrofit CPR overflow for it, which I will later silicone in and then drill the back of the tank for an overflow.

Next step was to re-setup my QT tanks.  Eons ago I had dreams of a coral farm, so I built this *enormous* shelf.  It holds 6 40 gallon breeders, and actually, can hold 2 more on top, but probably needs shallow ones if I were to do something like that.  Over the years it became a storage shelf, although I did have 3 breeders sitting on it, so, I cleaned those out, and filled one with saltwater.  Threw all the rocks in it so they would cycle, and then tossed on the HOB canister filter I still had for the QT setup.  Hrmm, dead.  Sigh, ordering a new one, and an impeller, just in case it works.  Threw in two random pumps I had lying about instead.  (aquasweeps!  Anyone remember those?)


I'll have to make up some more salt, and maybe setup a second QT tank, it's not like I have the room for it or anything....


OK, enough wallowing in sorrow for aquariums past.  Let's do something useful, or at least pretend to.

First up, I want to throw float switches on the Carlson surge.  I want one to go off when the bucket is about to fire, and the other to tell me if it's malfunctioned, and the emergency drain is being used.  I built a quick little bracket on my printer, and wired some BRS float switches onto it. Perfect.

While I was at it, I drilled and cut a few holes in the bucket lid, and zip-tied my new Neptune AFS to the lid.  Now the AFS is protected from evil saltwater, and it still drops food right into the bucket!  Also, the bucket is now covered so it won't damage my walls anymore, and it's a little bit quieter.

Now I just need to hook all this up to my breakout box that I bought like, a billion years ago and never used.  The little tiny wire holders on the older Neptune breakout box are really annoying.  I would much prefer fork connects.  So I rigged up a little connection bus to make adding more switches easy.


Basically fork connects come in from switches, and then I've pre-wired all the end points to the breakout box.  I have 2 connections for the grounds, because they all have to go into one connection.

And now it's all mounted up on the tank room wall, ready to go!

A quick check of the Apex, and yes, every time the surge is about to fire, the switch goes to the OPEN state.  Now I can write some cool code to make the Tunze Streams change speeds in concert with the Carlson surge, and really get some water moving around!

A virtual outlet like so:

[Bucket]
Set off
fallback off
if switch OPEN then On
defer 0:30 then OFF

This gives me a 30 second window of time around when the surge fires to turn up the pumps on that side of the tank and give it a little extra boom.  Should be fun.  Also, since I have one that trips if the emergency drain on the surge is ever used, I programmed that one to shut off the feeder pump to the bucket, to avoid any disasters, and tossed it in the email alarm for peace of mind.

So there is still a bit of time left in the day, so now, it's time to throw some safety at the ATO reservoir.  I purchased an AquaFX float valve from BRS awhile back, but then realized I had no way to hook it up inside the reservoir.  I also wanted to have a float switch in there, to tell me when the water level was too high, just in case the float valve failed.  My goal isn't actually to run the water level up to the float valve, it's more that if it ever runs long enough to fill to that point, hopefully the valve will stop it.

Either way now I needed a way to hook it up.  3D printer to the rescue.  Took some careful measurements of the 20g tank, and printed out a nice little bracket to hold the two devices.  A few hours later, and joy exists!

Now I hook up all the little bits...


And install into the sump!


Another pressing issue, is the Ruby Elite sump.  I ran a side-outlet tube from the main drain, over to the entrance to the refugium area of the sump, which is clear on the other side of the sump.  This is super problematic, as basically the water never decides to take that path.  I "fixed" it by installing a PMUP in there that takes water out before the skimmer, and sends it off into the fuge.  Of course now, the fuge is only processing about 100GPH, so this is really not ideal at all.


I started looking at the design of this sump, and something occurred to me.  The drain pipe has a neat design where it exits deep into the sump, into a little acrylic ring, this presumably keeps it from blasting everything around with water motion.  However, because this pipe is fully submerged, it means the water from the drain has to overcome the static pressure of air in there to actually drive water in.  Without a full siphon from the dursos, this will never happen.

Solution: Stop the static pressure!


It's just basic 1" PVC, so I cut up an old fitting I took off the tank at some point, and made a nice slant cut in it.  Smoothed the edges with a dremel and sand paper, and installed it.  The opening sits about halfway in the waterline, and now, water flows through!  Not a ton of water, but some water, and a little more helps.  I aimed the opening of the slant at the back corner of the fuge, so if it sprays bubbles (and it does), it does so into the acrylic wall, and not into the open air.  Perfect, problem made less problematic.

Finally, to finish off my work today, I finally got around to mounting the last of my Christmas presents.  A Dragon Touch 10" tablet.  Again, 3D printed some brackets I found on thingiverse, and up it went!


Now I have a nice display, right next to the tank, and can know the parameters at a glance, without even having to go into the fishroom.  I'm super happy with this.

So in the end, I guess the day ended on a good note.  Got alot done, more projects in the works, and probably solved more problems than I uncovered today, so, a win overall.

Feeling hopeful, I trundle off to bed...

Monday, December 24, 2018

Day 11.5, Holy uMol's Batman!

So just a brief update today, mostly because something surprised me.

I decided after the previous light test, that I was worried the lens rings I printed were putting the light out at too narrow of a beam.  The easy remedy, would be to print one more, without the focusing ring, and see how it compared to the other light.  5 hours later, I had the new ring, and the light went up on the tank.


You can see how one of the lenses is fully showing, and the other has the little V ring around it.  Both are just opaque white PETG plastic.  Nothing fancy here.

So I got out my trust Apogee meter, and set the lights to 45% ( 83 Watts ).  Placed the probe right under the original one, with the focus ring, and got a quick reading of 497 or so.  Ok, cool.  Lets put it under the other one.  Will probably be around 300ish, wait, what?  179.  Seriously?  179?  Oh I must still have this light set at 15%, hrmm, nope, 45%.  Maybe this ballast is flaky, swap cables, nope, still 179.  Nope.  That's the difference of the ring.  Slightly less spread to the light, and a doubling of PAR.  And it's true more or less at all the different positions.  Just better PAR.  I suspect less is flying off into the walls and whatnot.  But it's totally crazy.  I thought the rings would just give me an extra 5% or something, but this is truly nuts.  You can even see it in the tank.


Focusing ring is on the left in this photo.  The difference is visually astounding.

So I pulled the new ring off, and went ahead and assembled the rest of the lights with the focus rings that I originally printed, hung them all up, and gave a quick 45% power test:


This was taken at night, so the solar tubes aren't helping at all here.  They are kind of positioned where the dark areas of the tank on the sides and middle are.  I might still need some smaller supplemental lights, or maybe a light bar across the rear, but we will see.

Quick readings around the tank (still at 45% here) give me about 200ish PAR on the rocks, 70 or so on the sandbed.  I can live with this for now.

Also did another quick nitrate and phosphate test this morning.  Still too high.  That Chaeto needs to get to work.  Or I need to get to work and get the third fuge online.

Dreaming of Christmas Wrasses and Peppermint Angels, off to bed I go!

Saturday, December 22, 2018

Day 11, Measure twice solder 4 times?

So today a bunch of little tiny parts came in, mostly to do with the lights, and I was off to the races. It was time to finish one of them up, and mount it up above the tank for a test run.  I'm probably a month or so away from actually turning them on, but I want to be sure this will work, so, time to drill some holes.

The top end of the sink has some nice M5 holes for mounting a ballast, or other nonsense to, but I'm going to steal that, and instead mount a stainless steel plate 2.5" in diameter I got off Amazon.  So I took the plate, drilled a bunch of holes in it, got some stainless steel mounting hardware, and some small ABS spacers, and made myself little hangers.

Once the hangers were complete, it was time to mount the LED's to the sink, and bolt it all together.  I got some 50mm M3 screws, and used them to mount the light rings I 3d printed, and used the lens assembly and light right to basically mount the LED to the sink.  Time to give it a quick test at about 12% power on the floor.


Now speaking of power, I overdid things when I got my ballasts. I didn't quite understand how the Chinese rate LED's, so I got ballasts that were a bit more powerful than I think I'm comfortable running these days.  My ballasts are 185 watts.  I think realistically these are 133W chips, maybe less, but they run well at 140w, so, lets say 133.  So 12% power is really 22W, which is pretty significant.  They lit right up, no noticable heat at all.

Now was the time to bolt the hardware (stainless steel again) to the hangers I put in the ceiling, and start hanging a light!  I used 1 1/4" washers on the top, and one of those little nuts with the nylon inside that grips the thread better.  This should hold a small anvil, so I think I'm good here.


I experimented with various hooks, D rings, and other fiddly bits, but eventually went back to the rope hangers I purchased specifically for this.  They were approximately the right length, and the slight adjustability was just about right.


I carefully set the Apex to 15% power, and plugged the ballast in, and...


Woo.  I can has light.  Lets see how it looks from the front of the tank, and slowly ramp it up.

This is 15%, or 28 watts.


Lets try 30%, (55 watts)


Ok, ok, working so far, lets get crazy and go 50%, 92.5 Watts.


Ooh.. I'm liking it.  It's starting to look like it used to. The lights aren't quite as blue as the photos seem to make them, but they are a nice bluish white, which makes me happy.  I'm getting about 300 PAR here through the rather dirty acrylic top brace that is directly under this light, and about 1" under water.  Heat sink is measuring about 95' F, and a temp probe put directly on the chip is about the same..

Lets try 65% (120 Watts!)


Wooo.  Liking this.  About 400 PAR 1" under water (dirty brace still).  Now the sink is reading about 113 F, and about 117.5F at the chip.  These chips are generally happy under 60' C, and 117 is about 47.5 C, so, I'm still good here.

The sinks are *really* good.  Like some of the best I've ever worked with in my life.  If I take a measurement inside the sink, right above the chip, I get about 113'.  If I move all the way to the top, and take a measurement inside the sink (on the central heat tube core again), it's like 112.5.  That means the sink is wicking the heat up the full length of the sink, and not just dissapating it all at the bottom.  This is exactly what you want these things to do.  These are well worth the $104 each I paid for them.

At this point, I get a little nervous, and decide to crank them back down to 60%.  (111W).  Very little output difference really, but the heat drops to a steady 116' F at the chip.  Just out of curiosity, I decide I should measure the heat on my 20W passive cooled chips over my softy tank.  Those chips have been running every day for like 6 years now.  147'F.  Wow.  Just wow.  Didn't realize they were running that hot.  Either way, I think I like 60% power for now, so I decide I'll let it run for about 3 hours just to be sure it's stable.

The lens holders I printed have some V shaped sides on them, which you can see in a few of the photos.  These reflect the light downwards a bit more than just the lenses.  In fact, they do such a good job, that the light doesn't quite reach the front glass.  I am unsure how happy I am with this tight of a beam.  I'll probably have to try it out with all 4 at full running power (which will likely be 60-65%, even though I used to run them at 75%) and see how I like the effect.  I also need to get some PAR numbers with all 4 running, but that will be saved for another day.

In the meantime, back to work on the other 3 lights.  I cut some leads, this time using 16 AWG wire, instead of 12 AWG, as I just don't need that kind of current handling for the short leads, and they interfere with the lenses a bit.  I twist the wire up, and solder up the last 3 LEDs.  Now to make the rest of the mounting brackets, and assemble everyone!

I won't go into the full details of the build right now, I'll probably save that for an article.  However, because I'm re-using some components from the previous failball, I need to do some cleanup here.  The lenses are covered in salt (2 of them from falling into the aquarium), dirt, and 2-3 layers of failed glue.  Need to clean all that off, and get the lenses all sparkly clean on the inside before I mount them up.

Also, because I am not exactly Hackaday material with my soldering skills, I had to dremel out a bit of the bottom of each reflector, so the solder joint wouldn't interfere with the lens fitting.


Two of the lights I recently purchased are 50/50 lights instead of the 60/40 blue/white I ran before.  Seems the 60/40's are harder to get now, though I did find a line on them in case I need more.  But mostly I'm hoping these 50/50's are good enough.  The wiring on them does seem different though, so I'm a little unsure as to how they are wired internally.  Normally I would snip off the outer tabs on the LED's, but in this case, I'm a bit nervous that they are integral, so I'll be leaving them on the new ones.  I'll have to try them out tomorrow or something, and see how the light compares..

I'll leave you with a fun picture I took right before shutting the system off after the 3 hour test.  The lights at 1%, or 1.85 Watts.


Exhausted from hours of holding a temperature probe in a little hole, I shuffle off to bed..

Sunday, December 16, 2018

Day 10, Progress slows

I have like, maybe 10 different parts of this whole thing going at once, so sometimes I don't make as much actual progress on it as I would like. Some of the stuff that is in-process:

  1. Setup a QT tank, and fill it with rock from the older systems that needs to be cycled.  - 10% done.
  2. Drill a 25 high to be a dedicated Chaeto farm. - I bought a drill bit!
  3. ATO system - See below
  4. Lights - See below
  5. The ongoing salinity issue - slowly getting there, added salt to the ATO reservoir
  6. The surge bucket plumbing leak - See below
  7. Scrape the glass - Ugh, slow
  8. Clean out the Calcium reactor and prep for use - I've given it a stern look.
  9. Grow actual Chaeto - Success! Magic impending.
  10. Tyree cryptic bucket - 80% done, need actual rock. (see #1)
So lets talk about what did get done, or at least got done at.

First, the ATO.  Primarily due to my own inability to order the proper parts, my fancy Apex ATK has been offline since day 1.  I actually got all the parts a week or so ago, but my low salinity issues have caused me to fill the makeup water with saltwater, rather than R/O.

It occurred to me last night, that instead, I can just start dumping salt in the ATO reservoir, and let it do all the work for me.  So I dug through my bucket of ancient powerheads, found one that worked, plugged it in, dropped it in the reservoir, and dumped some salt in.  Problem eventually solved!

This leads up to last week's leak.  Yes, the brand new surge bucket was all running nicely, and then a fitting split, and stupid got all over the floor.  Initially, I wanted to get another one of those really nice manifolds from FlexPVC, but apparently they don't sell them anymore!  Sad acros!  Instead, I purchased a ton of different fittings, and made this abomination:


This gives me my 4 1/2" outputs, and my single R/O output. The idea of the manifold, is that it runs off the COR-15 in the sump, and feeds the two reactors (both running carbon right now), the surge bucket, and eventually it will feed both the extra fuge, and the cryptic bucket.  After a day or so of letting the glue dry, I plumbed it back in, and fired it up.

Sadly, only for a few minutes, as immediately it sucked the sump dry, and the main return started spitting out bubbles.  Luckily, this looks like a job for an ATO!  The ATO was running, but the problem is, when I fire up the COR-15, the levels all change immediately, which does activate the ATO, but it can't keep up with a COR-15.  So instead, I had to move the ATO limit switch up in the sump, to raise the water level, and then slowly bring it back down once the bucket was running again.

The fun part of this, is the Neptune ATK is really smart, and designed to keep a water level stable, and not flood your house.  This is a good thing.  It also meant I needed to defeat that, and instead, got paged all day by Fusion because the PMUP keeps running past the 5 minute mark and goes into shutdown.  I have no intention of defeating this, so I just suffered all day and reset it alot.

Finally, I got enough water into the system that it was stable with the COR-15 running at 80%, (alot of water loads up into that manifold and reactors, it's non-trivial).  And finally, the bucket was fired up again!  Joy!

Some of you have expressed interest in my solar tubes. It's a cloudy day today, so around 11am, I took this photo.  This shows a few things:
  1. I still fail at the scraping.
  2. I still need more rocks
  3. I have some algae that needs ganking, and some apistaisa.
  4. Light levels on a cloudy day.


Speaking of lights, some of my parts arrived Friday. I ordered 4 massive passive heatsinks from ledcdi.  The sinks are made by Mechatronix, and are called CoolBay Tera's.  They are monsters.  I kinda went overkill, and could have gone down to the Giga models, but, meh, I am uninterested in saving $20 and risking having to do this again.

So the state of my lights is this.  I have the sinks.  I have the lenses.  I have 2 brand new COB chips sitting around somewhere.  2 other brand new ones are en-route from China, and should have been here by now.  I also have 1 COB that looks like it's not burnt out, so I should play with it and find out.

First, lets discuss the old lights...  Here, you can see 3 of the heatsinks and light setups that were pulled down off the tank.  Like I said ages ago, they worked great, but when the fans died, poof.

 So how much heat does an LED on thermal runaway produce?  Well, enough to melt the solder clear off the heatsink and disconnect the sink from the heat tubes!  You can also see the joys of salt here, and how it got into the fins and caused ruin of the airflow.


Finally, a side by side of two LED's.  The one on the left is clearly blown.  The one on the right is hopeful.  (The little red wire was me using the blown one to practice soldering to the inside of the chip, rather than the outer connectors.)


So lying about the house, somewhere I knew I had a spare MeanWell HLG-150H-B sitting around, which is really close to what I run on the actual tank.  It's been so long since I fiddled with this, I had to go look at the manual again.  One of the great things about this driver, is that it's dimmable, in so many ways.  You can use a resistor, 0-10v PWM, or 0-10v (Apex VDM).  This is super handy, as I can just throw a resistor on it, and then use it to test LED's without having to use my welding mask.

So I got the old, suspect LED, and wired it up to the driver.

No go. It exhibits really odd behavior.  When you plug it in, nothing happens.  When you unplug it, you get a brief lightup of the diodes.  I suspect it's melted some traces somewhere.  Sad acros.

So instead, lets get one of the new ones out of the old box, wire that up, and see what we can make happen!


Let there be light!


Boom.  That looks *amazing*.  The old ones I have, are 60% blue, 40% 15K daylight.  They make for amazing lights.  And here you get your first glimpse at the absurdity of my heatsink.  Yes.  That's a 12lb heatsink.  All aluminum, coated in some kind of magical stuff that sinks heat away quicker, nice hole through the middle for the wires to run, and a massive internal heat pipe that wicks heat away from the center to dissipate it down the length of the sink.  Well worth $100 a pop.

Now that I know I can make this work, I needed to start dealing with the lenses.  The lenses are solid glass, and pretty heavy.  The old solution of "lets glue it to the LED and pray" didn't work. They all fell off.  New solution, 3D printer + PETG:


You can see in the final picture, the little holes on the sink (113mm centers) that will be used to attach the lens.  All I need are some 30-40mm M3 screws, and I can secure the lenses nicely.  I printed these in opaque white PETG, with an absurd number of top and side layers, as well as 50% infill.  They are stupid strong.  The little V at the top should provide a little more light focus, to prevent room spillover a bit more.  We will see.  For those of you wanting to try this at home, but without a 3d printer, it would be just as easy to do with a 120mm diameter Aluminum plate and a drill.

The parts came out almost perfect, but the hole for the lens was about 1mm too small, and the holes for the screws were a bit tight too, so I edited the model, and am currently re-printing it.  Once I have it all fixed up, I'll post it on thingiverse.

So next steps there are pretty much wait for a few more parts to arrive to do the actual hanging of the lights, wait for the rest of the LED's to show up, and then wire the whole lot and hang em high!

Hopeful for LED's in the mail, I wander off to bed..

Saturday, December 8, 2018

Day 9, The good, The bad, and the Obnoxious

Lots of little projects today, as I wait for the Chaeto to start growing and fix all my problems with algae magic.

First, I finally got ahold of some small RJ11 female-female couplers, and was able to extend the cables on my Neptune leak detectors.  I have 4 of the solid floor style, and placed one in each section under the stand, and one over near the R/O system (the one that flooded my house, yes, that one)

I finally got my shipping notification on the massive passive heatsinks for the LED's.  They will ship on the 12th, so, when I will actually get them is probably debatable, but hopefully in the next few weeks.  Because this is suddenly impending, I needed to get to work on the lights, so when the sinks arrive, I can just bolt them up and make with the glowy.

First step is I need a way to hang them.  Now the old lights were little CPU heat sinks that weighed maybe a pound each.  A simple screw-in hook was more than enough for those.  These heat sinks though, they are 4.5kg each.  And I need to hang 4 from the ceiling.  That is going to require a bit more beef than a 1/8" steel hook.


So first things first, I got some nice 1 3/4" square board, and bolted it to the ceiling with 4.5" lag bolts into the rafters.  These will give me a solid base to mount my lights to, and are strong enough to hold me on the ceiling, in case I ever go insane.


Next, I pre-drilled a bunch of different holes in some 2x4's, and screwed them into the square board.  This will give me a variety of mounting locations for each light.  The idea is to mount a 5/16" eye bolt into the holes, and then hang the monster from that.  They can easily hold me up off the ground, so I'm confident they can hold 25 lbs of light forever.


The square board gives me a bit of room so I can get in there with a wrench and put the nut and washer on the other side, and be able to move them to different holes at will.  I also went ahead and purchased some 50lb rope hangers, with adjustments, so I can easily raise and lower the lights to dial them into that perfect spot.  So excited to get them going again.

I also recently got my Mighty Magnet in the mail.  Previously I had an FF4 from them, and loved it.  Over the years it kinda lost it's strength however, and was always a little weak for the 7/8" acrylic.  So I got myself an F5.  I've been slowly scraping away at the coraline on the front of the tank the last few weeks, but this thing is so great.  The F5 holds much better, and I was able to make some real progress on the front glass.

One problem with an in-wall like this, is you cannot see the glass at all, so you are kind of scraping blind from the inside of the tank.  I figured out a little trick to this the other day.  What I did was get a big LED shop light, and place it in the front room, aimed right at the front of the tank.  Then I went into the fish room, and turned all the lights off.  Now with the light shining into the dark tank, I could see the algae on the front of the tank!  Eureka!  I could finally scrape the right part of the tank.  I've made some major progress here now on this, but there is alot of work left to do there.  A little bit every day after work helps.

Next on the checklist, is a Carlson surge bucket.  The original build had a Borneman surge, and I absolutely loved it, but it had some serious issues.  The Borneman devices are loud.  Stupid loud, and they sound like a toilet.  A toilet that flushes in your foyer every 10 minutes for the rest of your life.  And they splash.  Oh lord do they splash.  Ruined the drywall in the corner where it was mounted.  But that isn't the worst part, no, the worst part is the toilet flapper.  The rubber used in these things probably isn't designed for saltwater, because very slowly over the course of 6 months, it dissolves.  And when it finally breaks down, your surge stops working, and you have to get a new flapper.  The new flapper never works the way the old one did, so you spend a week re-tuning the chain and float to get the stupid thing to work again.  Every week or two the chain gets stuck or something and the thing sticks open.  It's a mess.  (And I ran one for 5 years, so this is not based on a brief encounter)

So I built a big Carlson surge in a bucket.  The main benefit of this is that it gives me an amazing way to feed my fish.  Food goes in the bucket, surge goes off, fish dance happily in the tank, guests are wowed, and none of the food goes into the overflow.  Win all around.  So after the requisite forever to tune the bucket, up it went!
I still need to get an autofeeder to mount on it, and a bunch of other tweaks for it, but that will come later.  For now, it's operating.  Or is it?

You see, right as I was about to get into my car and drive to work, I get a text from the Apex.  LEAKDETECTED = ON.  Oh, that's no good.  I was just in the fishroom like 30 seconds ago and didn't see anything.  It must be broke.  Maybe I spilled something.

Go back into the room to check, look all around, and wouldn't you know it, there is some water over by the R/O system.  A quick look around, and it's coming from the very manifold I plumbed in last week for the carbon filters.  I fiddled around for a few minutes, and couldn't find anything obviously loose, just saw water dripping out of the manifold.  Luckily it wasn't much.  Well, that's on the new COR15, so I held the button down for 3 seconds, water shut off, the reactors and the bucket both emptied out through the COR15 into the sump, and the leak stopped.  Definitely the right choice not to put a check valve on that feed pump.  Threw a towel on the floor, sopped up some stupid, and off to work.

When I got home, I investigated the manifold.  I figured maybe I did a bad job putting in one of the little adapters.  Nope.  One of the little adapters split right in half.  Boom.  Fail.  Argh.   So now I'm waiting for a new manifold and little bits to fix this from FlexPVC.  Hopefully next week I can get the carbon running again.

Overall though, I'm happy with the result.  I know the Apex did the right thing, it told me there was a problem, and stopped a major disaster.  I went ahead and added some code to the COR15 so if that leak probe ever goes off, it shuts down.  Now the problem will be self healing in the future.  That, right there, is worth the price of entry into the Apex.  It just saved me probably $1000 in repairs if that pipe had kept leaking all day.

Day 9 over, damp, I go to bed.

Saturday, December 1, 2018

Day 8, Of manifolds and refugiums.

One of the things I purchased, and now regret, is this little 9w refugium LED.  It looked like a decent little light.  An Aquagadget ChaetoMAX.  When it arrived I was rather surprised at just how tiny it really was.  Just to play around, I hooked it up to an EB832, and turned it on.  It's not bad, it does provide light.  But hey, the EB832 says it's only drawing 6 watts.  Hmm.  Not very impressive.

So I needed to actually do something to light the Ruby Elite.  In retrospect, the Elite, despite having a larger-by-volume refugium, is not really well suited for growing Chaeto.  The problem lies in the fact that it's a long narrow section, which makes it hard to actually light.  I can't just throw a giant nuke lamp on it, because that will light up the whole sump, not just the refugium area.  No good.  Instead, I found 3 little 15w LED grow lamps, and a nice little 3-bulb hanging light kit.  Funny thing about these,  1/8th the price, and they actually draw 15 watts each off the EB832.
That's just one of them lighting up the night.  A few notes about this photo.  First, originally, I wondered, would the drain have enough oopmh to push water down that side pipe into the refugium area.  Answer:  No. The COR-20's are a bit too anemic to keep those drains at siphon, so they don't actually blast water down like they used to.  So that's basically a dry pipe.  I might try raising it a bit out of the water to see if relieving the static pressure helps though.  So to tide things over, I installed a PMUP in there, and have it pushing water into the refugium.

Then I was a bit worried about sending light over into the pump zone, and growing tons of algae in there.  So to solve that, I purchased a big sheet of white plastic off Amazon, and some small epoxy coated magnets.  Attached it to the inside of the refugium, and now there is a bit of a reflector in there and the pump area stays nice and dark.  Oh, and that little 9w disappointment?  Well, it actually runs pretty cool, so I stuck it on the side near the bottom, and it side-lights the area.  I think this will actually help just a bit.

A small bit of Chaeto arrived from Algae Barn, and in it went.  Lets hope it likes it's new home.

Now on the other side, we have a bit more room.  So off to ebay I went, in search of the smallest high-power grow LED I could find.  Yeah, I said the smallest, because when you start looking for grow LED's on ebay, you find all of these 1200w monstrosities that could melt your tank down.   Finally, I found a little 150w (the ratings on these are pure nonsense, I think it actually pulls like 130w) light, and today it arrived.  Into the sump it went!  I wanted one with a dimmer,  because I was a bit afraid it would be too powerful right off the bat.


I don't know why one would want to farm spiders.  That seems awful.


Here it is at lowest power.  Pretty bright actually.  A little more blue than I expected, but I think it won't be an issue.


And at full power.  That is bright.  This thing is a beast.  I have it suspended off some of the cross braces of the stand.  I'm pretty happy with it, but time will tell if it really works.  I need some chaeto to feed into this, hopefully I'll get my hands on some soon.

One might also notice the Neptune ATK in there, all plumbed up and ready to go.  No, not really.  The cords on the PMUP's are super short.  I need another 6-8 feet at least just to get it to the plug.  So I ordered a 1Link extension cable for it.  Yes, you read that right.  I ordered the wrong cable for it.  So now I'm waiting for the right cable, and just doing topoff by hand until then.

However, this gave me time to work on a different problem.  My Neptune salinity probe has been driving me nuts.  Keeps saying the salinity is 24, when the refractometer says 39.  Neither is a good number, so I've got to fix that mess.  Recalibrate the probe.  24.  Do it again. 24.  Argh.  Get the refractometer out, check that, 39.  Argh, recalibrate the refractometer, no, it's right, add the special fluid to it, read 1.035.... wait.. I'm supposed to read 35, not 1.035.  Oops.  Grumble, fix that.  Oh.  yeah.  So my water is actually 24.  How about that?

So while I patiently wait for the right cable to arrive, I'm doing topoff with saltwater to fix the salinity.  Good thing the only things in the tank are some worms, pods, and one amazing Nassarius snail that seems to have survived the entire ordeal.  Wow.  (I mean the entire, 3 year shutdown ordeal, not just the past few weeks of me fiddling around)

So now I'm off to fix another mistake.  Previously, I plumbed the side output off the right sump, in that special way that invalidates the check valve, and makes it siphon the tank down through the reactors during a power loss to the pump.  Rather than try to fix this, I decided I would redo the entire idea.

The COR-20 just isn't powerful enough to be a return, and run those reactors.  But they make this nice little COR-15, that is enough to run the reactors, and a few other ideas I have.  So I get one of those.  Bonus, it doesn't need a plug, it hooks right into the EB832 with a 1link cable.  So I disconnect the side output, screw a plug into it, and now my anti-drainback works just fine.  Also, bonus, I got to test out my fixes for having one pump "die".  I unplugged the COR-20, and just like I planned the sumps balanced via the pipe connecting them in the back.  Everything worked perfectly.

So first I make the world's most complex drain system.  This manifold will let me connect a variety of drains from reactors, and god knows what else, and feed them all back into the sump.  The COR-15 is plumbed into the other manifold, that has a bunch of outputs that feed reactors, and other mysterious ideas I might have floating around for future enhancements.

Now I fire it up, and boom, I have reactors.  Fill them up with carbon, and everything works like a charm, with the COR-15 at only 50%, I'm super happy.

Now all the basic support equipment is wired in, things are running, tank is stabilizing.  It's finally getting there.  I have a few weeks until the lights show up for the top, and a few other side projects to work on.  But other than the lack of chaeto for the right sump, things are mostly working, and it just needs to run for awhile.  That's fine, I have lots of little ideas for tweaks to make while it's stabilizing.

Day 8 comes to an end, and I head to bed, completely... drained...