Thursday, March 31, 2016

Trenchin' ain't easy

Today I finally got around to installing my moisture sensors in the lawn.  I'm using the one-wire moisture reader from http://www.hobby-boards.com/store/ (who, btw, are sadly going out of business and fire-selling all the inventory, so if you want one, buy it now.

It uses the probes from a Davis moisture meter.  I think they were about $75 each, so a bit pricey!   Sadly, I purchased the setup about 2 years ago, but have kept putting it off, because, well, digging a trench sucks.

However, the trench is done, and the probes are installed.  Luckily, literally 5 minutes before the lawn guys showed up to mow.

A long time ago, I buried a length of direct burial wire right up to the edge of the lawn.  After playing forgetful pirate for a few hours, I located the buried bundle, and pulled it all out.  I needed a way to connect the sensors to this Cat6 that wouldn't end up with water inside the sensor.  I think I came up with a good way, we will find out over time.

The wires, all hooked up.

For each one, I stripped the middle of the wire, hooked the sensor up to the chosen pair, and then jammed it through a hole I drilled in a 3/4" PVC end cap.  I then filled the little chunk of PVC with silicone, let it dry, and then installed the other cap.  Hopefully this will keep the sensor connections dry.  I also did use shrink wrap on them, so it should be fine.


I was also apparently smart enough to bury an extra wire, so I used this to hook up a DS18B20 temperature sensor too.  I did essentially the same thing for that one, except this time,I put a huge glob of silicone all inside the hole, and pushed the sensor through that hole, so it would be close to the outside, without actually touching any water.


Finally, each sensor was buried in the ground in it's final resting place.  I was able to find the manual online for the sensors, and it suggested a 45' angle, 3-5" deep for turf.  So that's what I did.  Rather than digging a full trench, I just used a shovel to make a slit in the ground, and then found some random tool and shoved the wire down into the slit.  Basically, it just needs to be deep enough so a mower doesn't eat it.  They said to install the sensors soaking wet, so right now, I'm not getting any useful data from them.  Well, the ground temp sensor is reading 61F, and it's about 70F out right now, so that's something I guess.

As part of the prep for installing the sensors, you are supposed to soak them for 30 minutes, and let them dry for 12 hours, over and over.  While doing this, I noticed they dry out very slowly.  They were not quite fully dry by morning, maybe half way.  So they probably respond rather slowly.

Also, in what was a bit of a surprise to me, they read in cb, or centibars, which is a unit of pressure.  Basically they tell you how much pressure (like suction on a straw) is required to remove moisture from the surrounding soil, into the sensor.  I guess this simulates roots drawing water in, and how difficult or easy it is.  Bone dry, a sensor reads 199cb.  Soaking wet, 0cb.

Once I have some accumulated data, I'll post pretty graph pics.

Tuesday, March 29, 2016

New version of gnhast - 0.4

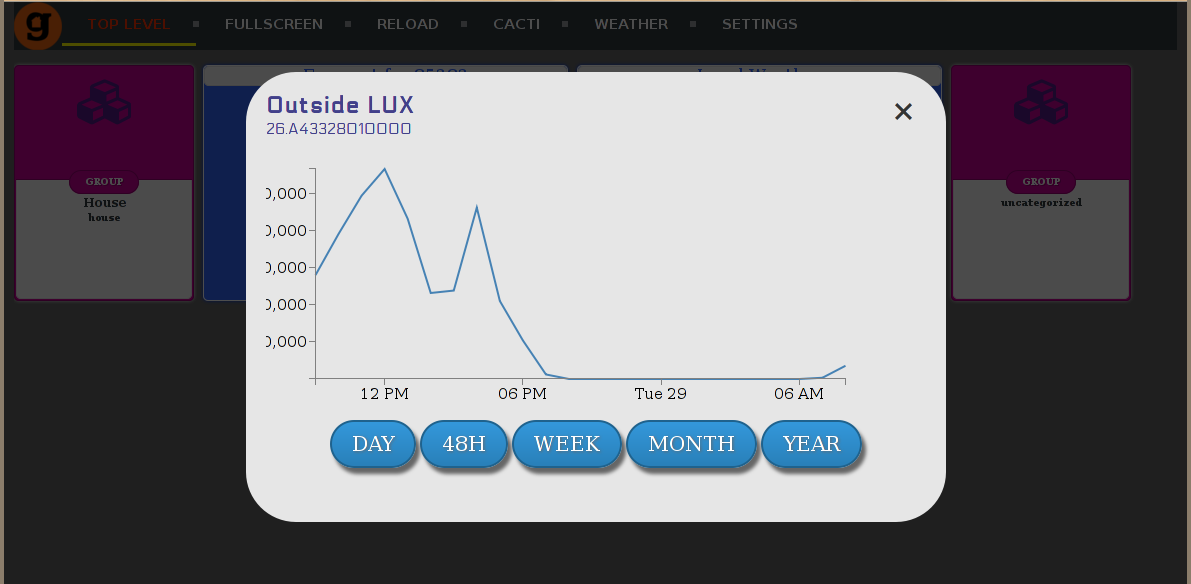
Gnhast 0.4 has been released today, and while it has a bunch of fun new features, it also has one really big one.  A web/tablet interface!


Lets look at the changelog, and then back to the pretty pictures:

0.4 - Release Version
        Added Collectors:
                moncoll
                jsoncgicoll

        Added Tools:
                gnhastweb
                gtk-insteonedit (partially complete)

        Added Commands:
                cfeed
                setalarm
                dumpalarms
                listenalarms
                ping
                imalive
       
        New Features:

        Support for new style insteon HUBs.

        Collectors now have self-health checks, and gnhastd monitors them.  A collector will be flagged as bad if it doesn't send updates, or fails to respond to "pings".  This can help with certain devices that get  wedged up after awhile, or collectors that die off mysteriously.

        moncoll collector is a special collector that interfaces with the collector devices created on the gnhast server, and when a collector is marked bad, it can restart the collector, forcibly if needed.

        cfeed is a new type of feed to monitor switches.  Unlike the usual timed feed, cfeed will notify the listeners immediately upon change.

        Add an alarm subsystem.  This is very basic.  Each alarm has a user-generated uid, a blob of text, and an arbitrary severity number. This can be used by scripts to post generic alarms to other things. Currently nothing uses this, eventually the web interface will be made aware of it.

        gtk-insteonedit is a tool to allow link editing of insteon devices directly.  It is still partially complete.

        gnhastweb is a full fledged web GUI for gnhast.  It allows basic editing of devices, and placing devices into groups.  However, what it is actually designed for, is to give you a tablet/phone based control panel for your house.  Each device is a small "card" on the UI,       and you can interact with them.  They are dynamically updated with the current status, and you can do things like flip switches on and off, adjust dimmers, etc.  It can also interface with your rrd files generated by rrdcoll to display simple graphs of sensor data.  The interface is completely configurable via conf file.  You can even substitute hand-generated html for some, or all of the groups, to do something like use an image map of your house as the navigation.  More documentation on this will need to be provided.


So what kinds of things does gnhast support now?  All kinds of fun stuff.  ad2usb Ademco/Honeywell alarm interfaces, IrrigationCaddy sprinkler controllers, Venstar thermostats, and of course everything it previously supported.  Insteon, one-wire, Brultech, etc.  And now you have a nice interface for a tablet to control it all, that you could mount on your wall.  Hint.  Hint.

Download it here

Monday, July 14, 2014

Soda Fountain, installed and working

The soda fountain is installed, and up and running.  Still lots of finishing and tweaking left to do, but the general workings of it are done.  Yay.  Had my first glass of coke!

Things that still need doing:

1) Need to check for leaks, and move the tower all the way back down the counter.
2) I'm not happy with the connection between the RO line and the water inlet for the carbonator.  I need to find a better connection fitting.  Be aware if you do this, the tubing is not compatible at all.
3) I'd like to get a pressure gauge on the water line to verify I have the right pressure.
4) I think the upper cabinet will need to be vented.  That coldplate generates way more heat than I would have imagined.
5) Need to get ahold of syrup.  It came with a single 2.5g box of coke, which was handy, as it allowed me to set it all up and test on the first day.  Sprite will be easy.  I originally wanted A&W root beer, but that is starting to look very unlikely.  As far as I can tell, nobody sells it.

More on syrup later. For now, YAY soda in my kitchen!

Soda tower

Here, you can see the tower, which is close to it's final location.  I need to push it back about a foot eventually.  For now, it's sitting forward so I can make sure there are no leaks in the syrup/soda lines coming out of it.
 

The coldplate, and carbonator, installed in their final resting place. The carbonator has a single clear tubing lime coming out the side.  I'm not sure what it's for. Just in case it's something zany, I have it running into a cup for now.  It appears to not be spitting out water though, so I should be good.


The syrup lines needed to be extended by about 5 feet to reach the pumps, splices were added.


The CO2 canister, and my one, lonely box of coke.  More to come.

And finally, the syrup pumps all wired up.  Interestingly, these run purely off CO2.  No power needed.  I thought for sure they would be electric, but nope.  Oddly, the tower IS electric, so it needed power.  Also worth noting, they vent CO2 right out the side when operating, so, umm, hrmm.  Not sure yet how to handle that.

Saturday - Drill holes, unbox

On saturday I spent about 7 hours making holes in my house, and running wires and cables for the system.  Tons of work to be done.  There was an electrical outlet/switch next to the sink that would have been covered up by the tower.  This needed to be moved about a foot up so you could still turn the sink light on. 

The icemaker (remote coldplate) is pretty big.  Big enough that it will not fit under the sink because of the sink piping and the garbage disposal.  Boo.  This means the only place it would fit is in the cabinet over the fridge.  That means the tubing for it needs to run through the wall, and then out the side next to the sink.

Unwrapped the components

 Here, you can see the tower, assorted bits, the carbonator, and the syrup pumps.  All in all, it's a pretty nice setup.  No complaints.
The chiller/coldplate


 The chiller/coldplate is "interesting".  It's basically a hacked-up icemaker, with a coldplate jammed into it.  It has a mess of tubes coming out of it.  Everything was clearly labeled though, so no worries there.


 This outlet is the badguy in question.  He needs to be moved about 1 foot up, so the tower doesn't obstruct it.


 And here, we can see said outlet, moved vertically.  Annoyingly, there was a stud there, which apparently they notched to fit the one below it.  1 hour later with saws, drills, and chisels, the stud was notched.


 This is the cabinet above the fridge.  It's here that the coldplate will live. 


 The remote coldplate needs power.  So does the carbonator, that will also live up here.  Since I already have an outlet torn open on the side, I ran wires down to it, and wired this outlet into that one.  In the lower left corner, you can see a big hole drilled.  This is to run the syrup and soda water lines from the coldplate into the tower.  They will run inside the wall, and come out where the old outlet was.


 Needed to run the RO tubing out of the RO, and into the wall.  This meant I had to drill through the side of the cabinet, and then into the wall.  Once into the wall, it followed the same path as the soda tubing, up into the cabinet.


In the pantry, next to the fridge, I will house the CO2 canister, the syrup boxes, and the pumps.  Simply mounted the pump onto the wall. It's very nice that they supplied a little mounting bracket and everything for it.  I'm pretty happy with it.  3 screws, and done.


 This is where the syrup boxes will live, and eventually, the CO2 tank.


 Coldplate test-fitted up into the cabinet.


 Needed to drill a hole into the cabinet from the pantry for the syrup lines.  Done.

The original outlet, all torn up.  There are two separate circuits here.  How annoying.

Saturday, July 12, 2014

Opening up the boxes

The soda parts arrived thursday.  Took approximately 2 weeks from the day I ordered it from sofaparts.com until arrival.  Here is a brief "unboxing":


Three massive boxes.  Not shown, is the 2.5 gallon box of Coke they also sent.


 I upgraded to the 10lb bottle of CO2 for an extra $30.   I suspect I will be glad.  You can see here the syrup pumps, the carbonator, the tower itself, and the CO2 bottle.


And here we can see the chiller itself.  It's big, and it's super-heavy.  Yikes.
The first task in setting up my soda fountain was to upgrade the RO.  My old one was pathetic, and drove me nuts anyhow.  It was some GE thing, that generated like 3 GPH.  The new one is from bulk reef supply.  75 GPH, and I added a pressure pump to it to make sure it kept the tank full.  I also went ahead and replaced all the lines with 3/8" instead of the 1/4", because the carbonator needs a lot of water, and apparently a 1/4" tube will not cut it.


The first picture here, is the new RO, all installed (except for the final plumbing to the carbonator).  I added a bunch of valves to the installation, so I could easily shut off sections of it for replacement in the future.  In the past I've had to drain the entire system, shut water off, etc to do any sort of work on it.  This should fix that silliness.


Another view showing the new bits in place under the sink.  Yay.


Here is a "before" shot of the kitchen, all primed and ready for a bunch of holes to be cut in it!  The tower will sit to the left of the fridge, next to the sink.  The carbonator and chiller will hopefully be going in the cabinet above the fridge, and the CO2 and bag-in-box syrup will live in the pantry next to the fridge.

A home soda fountain

I've recently picked up a home soda fountain.  Installing this should be a ton of fun.  In order to keep my kitchen looking clean and professional, I'm going to have to cut a bunch of holes, and route lines and power all over the place.

In the next few posts of this category, I'll detail my experiences so others can benefit!

Here's hoping it all works out great.  (ha)